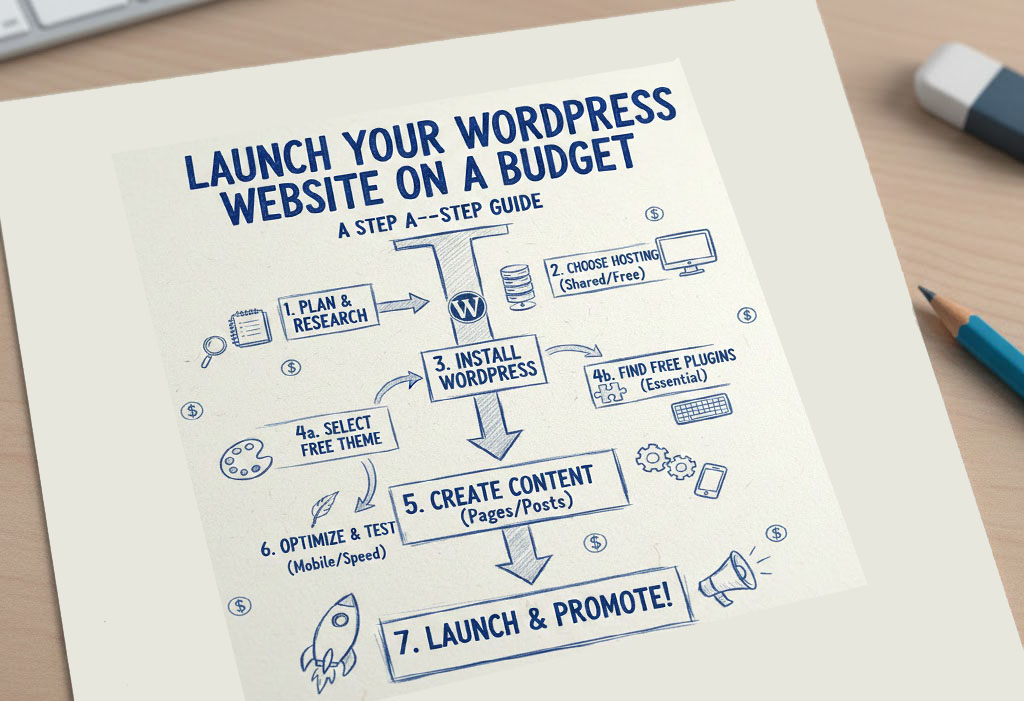
Dreaming of your own corner of the internet but worried about the WordPress website cost? Building a professional WordPress website doesn’t have to break the bank. With a smart approach, you can launch a stunning site on a shoestring budget. Here’s the guide on How to build a wordpress website and where to get started:
Step 1: Choose Affordable Cheap WordPress hosting or the Mini Cloud (The Foundation)
This is where most of your initial cost will be. Shared hosting is your budget-friendly best friend. Providers like Hostinger, Bluehost, or SiteGround offer plans for as little as $2-$5 per month. Look for plans that include:
-
A free domain name for the first year: This saves you around $10-15.
-
One-click WordPress installation: Crucial for beginners!
-
Free SSL certificate: Essential for security and SEO (your site will show as “secure”).
- Good customer support: You’ll appreciate this if you run into issues.Once you’ve chosen, sign up and register your desired domain name.
If you consider portfolio website making is a hurdle for you call Vertical Eleven Business Systems, we are the cheapest portfolio website plan provider in India.
Step 2: Install WordPress (The Engine)
Most budget hosts provide a “one-click install” button for WordPress within your hosting control panel (cPanel or similar). It’s incredibly straightforward. Just locate the WordPress icon, click it, and follow the prompts. You’ll set up your site title, username, and password during this process. Congratulations, your WordPress foundation is now laid!
Step 3: Select a Free WordPress themes (The Look )
WordPress boasts thousands of free themes. These templates dictate your website’s design and layout. Navigate to your WordPress dashboard ([suspicious link removed]), go to Appearance > Themes > Add New. Search for popular, highly-rated free themes like:
-
Astra: Lightweight, fast, and highly customizable.
-
GeneratePress: Another excellent choice for speed and flexibility.
- Neve: Modern, responsive, and easy to use.Preview several, activate the one you like, and customize it using the WordPress Customizer (Appearance > Customize) to change colors, fonts, and header images.
Step 4: Add Essential Free Plugins (The Functionality)
Plugins extend WordPress’s capabilities. Go to Plugins > Add New and install these must-haves:
-
Classic Editor / Block Editor (Gutenberg): For writing content. The Block Editor is default now, but Classic Editor offers a simpler interface if you prefer.
-
Yoast SEO / Rank Math: Essential for optimizing your site for search engines.
-
Smush / Imagify: Optimizes images to improve loading speed.
-
WPForms Lite / Contact Form 7: For creating contact forms.
-
UpdraftPlus: For website backups (critical!).
Step 5: Create Your Core Pages (The Content)
Start with the basics:
-
Home: Your welcoming front page.
-
About Us/Me: Tell your story.
-
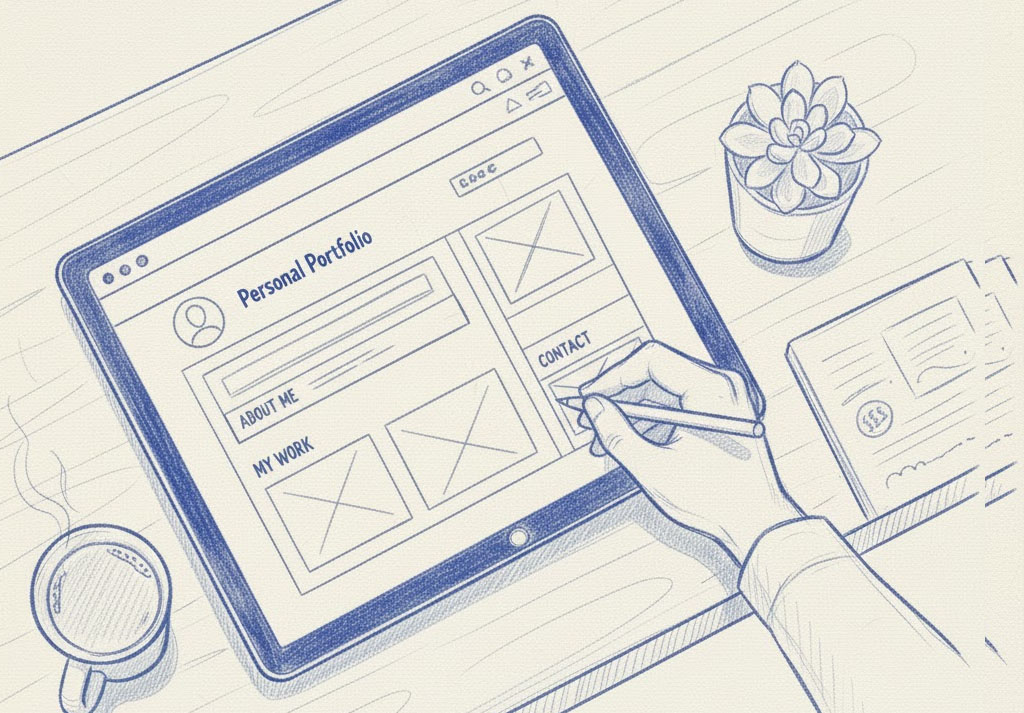
Services/Portfolio: Showcase what you do.
-
Blog: Share your expertise.
- Contact: How people can reach you.Go to Pages > Add New and start writing! Add images (royalty-free ones from Unsplash or Pexels are great) and organize your content.
Step 6: Launch and Promote!
Once your pages are ready and your site looks good, it’s time to launch! Ensure your site is set to “public” (Settings > Reading > Search Engine Visibility – uncheck “Discourage search engines”). Share your new website with friends, family, and on social media.
By carefully selecting free resources and starting with budget hosting, you can establish a strong online presence without financial strain. Happy building!
-
WordPress website cost
-
Free WordPress themes